This site is created at the Nethouse site-building service. Would you like to have a similar one?
For the site owner

Статьи

Fix QuickBooks Found an Error When Parsing the Provided Xml Text Stream

Many users are having trouble with their QuickBooks account related to the special characters in it. This issue shows up in the form of the error message that states the following message QuickBooks found an error when parsing the provided XML text stream. Through this piece of writing we will get rid of the error and any doubts related to it.


Reasons behind the error during parsing of the XML Text Stream

The major causes behind this error are as follows:


  • User may be using symbols that are invalid.
  • When the user is pasting the data of another program, this error may appear on the screen.
  • Certain unsupported special characters used by the user may instigate the error.


Various solutions for the resolution of the QuickBooks found an error when parsing the provided XML text stream error

Follow up the solution given below so as to resolve this QuickBooks error.

1st Solution: Deletion of illegal Characters


  • Within the Windows desktop, hit on the Start menu.
  • Type %APPDATA% in the search box and press the Enter key.


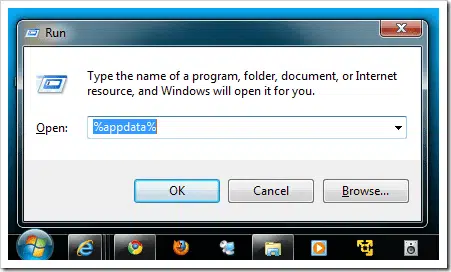
  • The Application Data Folder gets displayed on the screen.
  • Next, the user should opt for the QBXML.log file and right-click on the file.
  • Now, choose Delete button on the keyboard.
  • Now, again upload the company file to QuickBooks.
  • If users try to use the ESC Accounting Server to connect to QuickBooks, notice if the ESC client gets hanged or not.
  • Restart the accounting application soon after.
  • The QBXML.log file now regenerates in the Esc directory when you try to upload it.
  • Check the most recent entry after launching the QBXML.log file.
  • The user can see the transaction that is creating the problem in this.
  • Now, by opening the records in the ESC, the user can quickly look for the restricted characters.
  • After removing any prohibited characters from records using ESC, save the records once again.


Solution 2: Removal of Characters through QuickBooks


  • First, launch QuickBooks and the move to the Sales menu.
  • Next, choose the Invoice List View.
  • From the View Panel, locate the Unlisted Invoices list.
  • You must record the invoice numbers for unstopped invoices for the length you intend to post on QuickBooks.
  • Under the File menu, publish the invoices one at a time rather than in chronological order by going back to the QuickBooks Screen and clicking Post.
  • After that, access the specific invoice in ESC Sales Invoicing screen.
  • Now, remove the text from the invoice taken from ESC.
  • After erasing, manually type in the content.
  • It assists the user towards erasing hidden text as well as formatting that was copied and pasted into ESC but is not visible.
  • After completing this, make sure that the item's description doesn't contain any special characters that aren't permitted.
  • Once more, after finishing the modifying procedure, save the invoice.
  • In QuickBooks, hit on File Post to QuickBooks from the previous menu.
  • The invoice will then be posted to QuickBooks. The recently issued fresh invoice is free of errors and other issues.
  • At the conclusion, use the standard procedure to post more invoices into QuickBooks.


We hope that the procedure included herein could troubleshoot QuickBooks error during parsing of the XML Text Stream. Still facing issues? Just reach out to our QuickBooks error support team at 1-800-761-1787.

What are the ways to get rid of QuickBooks Error 6130, 0?

QuickBooks Error code 6130, 0 is a common error experienced by QuickBooks users. This error evokes primarily due to certain issues with your company files. Make sure you read this article all the way through to find out the causes and troubleshooting methods to fix QuickBooks error 6130 0.

Main instigators of QuickBooks Error 6130, 0


  • Incomplete installation of QuickBooks software.
  • Corrupted Windows registry,
  • Incorrect or damaged QuickBooks Desktop files.
  • The QuickBooks files might have been deleted accidentally.


Procedure to resolve QuickBooks Error 6130, 0

Procedure 1: Repairing Windows Registry


  • Press the "Start" button to begin.
  • Type command in the search box, but don't press Enter yet.
  • Hold down Ctrl and Shift and hit the Enter key on the keyboard.
  • There will be a box that asks for your permission.
  • Opt for Yes.
  • A dialogue box that blinks will show up in a black box.
  • Press the Enter key after typing Regedit.


  • After that, go to the File menu and choose Export.
  • To save the QuickBooks desktop key, choose a folder from the Save In list.
  • Then, in the File Name field, type the name of the files you want to back up.
  • Make sure that the checkbox next to Selected branch is checked in the Export Range field.
  • Click the "Save"
  • Automatically, the file will be saved with the. reg file extension.
  • If this method does not solve your problem, try the next one.


Procedure 2: Malware Scan

The malicious threats can change, delete, or damage QuickBooks files. So, we recommend that you run a full system scan to find and get rid of any dangerous viruses on the system.


Procedure 3: Delete system junk


  • Click on the "Start"
  • Type "command" in "search." Hold down the Ctrl and Shift keys. (Make sure you don't press Enter before).
  • Then, press the Enter key.
  • When you are asked, a box asking for permission will pop up.
  • Choose Yes.
  • Type cleanmgr into the search box and press the Enter key.
  • Using Disk Cleanup, you can find out how much space the temporary file uses and delete it.
  • After you've checked the boxes for the categories you want to clean, click OK.


Procedure 4: System Restore


  • Click the "Start"
  • Type System Restore into the search box and press the Enter key.
  • Click on System Restore twice.
  • When asked, enter the admin password.
  • Follow the steps in the Wizard to choose a restore point.
  • Make a copy of your computer.


Procedure 5: Go for SFC/Scannow now


  • Click "Start," then type "command" into the "Search"
  • A box that asks for permission will show up. Make sure not to hit the Enter key while holding down the Ctrl and Shift keys.
  • Select Yes.
  • A blank screen (called a "Command Prompt") appears.
  • Type SFC/scannow and press the Enter key.
  • This procedure should help to fix QuickBooks Error 6130, 0.


Procedure 6: Clean install QuickBooks


  • Click the "Start" button, then, choose "Programs and Features".
  • Choose Control Panel from the right side of the menu. In the control panel, click on the Programs and Features button.
  • Find QuickBooks and click on the Uninstall/Change option after that.
  • Click the Uninstall button in the top menu.
  • Wait for Process to finish removing the QuickBooks program.
  • Now, get the accounting program reinstalled on your system.
  • Use your original product and license keys while activating and registering QuickBooks.


Procedure 7: Update your Operating System


  • Click the "Start"
  • Then, in the search box, type "update." Press the Enter key soon after.
  • The Windows Update window will pop up.
  • Click on the option to Check for updates.
  • After that, if there are updates available, choose the option to Install Updates.
  • Restart your PC to start installing the updates.


The walkthrough provided in this article should help you in the process to fix QuickBooks Error 6130,0. If you need help from our certified team of QuickBooks experts, just call us at the helpline 1 800 761 1787.  


Approaches To Troubleshoot Login Issues in QuickBooks Online

QuickBooks users have been facing certain login issues while using the Google Chrome web browser. The error that pops up obstructs users from using QuickBooks Online. This can be extremely annoying and can lead to unwanted delays in work submissions. We will go through this error elaborately and will also unfold the various approaches to fix login issues in QuickBooks online through Chrome. For live expert assistance, connect with us at the helpline 1 800 761 1787. Our QuickBooks professionals will aid you through the troubleshooting procedure.


Several issues related to QuickBooks Online Not Working with Chrome:


  • When you log in to QuickBooks Online on Chrome, you see a blank screen.
  • Unexpected error while using Google Chrome to log in to QuickBooks Online.
  • Problems logging in to QuickBooks Online due to a wrong version of QuickBooks Online on Chrome.


How to Fix Login Problem in QuickBooks Online on Chrome

Follow the troubleshooting guidelines given below for an easy resolution of the various login problems in QuickBooks Online

1st Approach: Change System Date and Time


  • Right-click on the time and choose "Change date/time."
  • Pick the right time zone, date, and time.
  • Afterward, press the Enter key.
  • Once you're done, try using Chrome to access QuickBooks online and see if the login error is gone.


2nd Approach: Check your net connectivity

To fix the problem where QuickBooks Online login issues, you need to make sure you have a seamless Internet connection. While using QuickBooks Online on Chrome if you get the error "Page cannot be found," try going to a different secure website, it reflects that you have an internet related issue. However, if the website loads, that means your Internet connection is working.


3rd Approach: Deleting Cookies in Chrome


  • While in Chrome, press the Ctrl, Shift, and Delete keyboard keys at the same time to open the Clear Browsing Data window.
  • Choose "All Time" from the "Time range" drop-down menu.
  • Choose the options for Cookies and other site data and Cache images and files.
  • To finish the process, click on the Clear Data option.


4th Approach: Reset Internet Security & Privacy Settings


  • Click the "Start" button, then type "Internet Options" into the search box.
  • Double-click on Internet Options, then click on the Security tab.
  • After that, click on Internet and move the slider to the medium-high position.
  • To finish, click the Apply button and then the OK button.


5th Approach: Open the Incognito or Private window in Google Chrome


  • Start the Google Chrome web browser.
  • Press Ctrl, Shift, and N together to start the incognito mode.
  • Alternatively, click on the menu and then choose the "New Incognito Window"
  • Once the private window opens, you can sign in to QuickBooks Online to see if it is successfully signing in without any errors.


6th Approach: Add new user in Chrome Browser


  • When you click the three dots in the top right corner of the Google Chrome window, you should be able to see a list of options. You must choose "Users".
  • After that, click on the option to Manage users and then choose the "Add Person"
  • After that, type in the user name.
  • Next, click "Create" to add a new user.


  • A new user shows up in the upper left corner of the Chrome window when it is created.
  • Subsequently, switch to the new user, and then try to get into your QuickBooks Online account.


That was all related to the different methodologies you should adopt to fix login problems of QuickBooks Online on Chrome. If you need assistance from our certified experts, just give us a call at our helpline 1 800 761 1787.

Procedure To Troubleshoot QuickBooks Error H202

Error code H202 often shows up when you try to use QuickBooks in the multi-user mode. In this case, the error message shows that multiple users are not allowed to connect to your server PC. This error can be very annoying because it prevents you from reaching out to your QuickBooks company file. You can fix QuickBooks error H202 with the help of the troubleshooting steps provided in this article. If you need technical support, just give us a call at 1 800 761 1787.

What causes QuickBooks Error H202?

The following things can cause the Error H202 in QuickBooks.


  • Some important QuickBooks services, like QuickBooksDBXX and QBCFMonitor, might be disabled.
  • Wrong hosting settings can also lead to this error.
  • QuickBooks can't find the IP address of the host system or server, where the company file is kept.
  • Error related to DNS servers my also cause Error code H202 in QuickBooks.
  • A broken or corrupted network data file may also lead to this error.


What is the procedure to fix QuickBooks Error H202?

Implementing the below-given troubleshooting methods should definitely assist you in the easy resolution of QuickBooks Error H202. 


Solution 1: Run all QuickBooks Services


  • Type Run into the search box.
  • After that, type ‘’services’’ into Run window.
  • Follow it up by hitting the Enter key.
  • In the Services tab, double-click QuickBooksDBXX
  • Select Automatic under Startup Type.
  • You must choose the option to Stop in the Service Status.
  • Select the Recovery tab next.
  • Choose the option to Restart the Service.
  • Click on the Recovery tab now.
  • To save the changes, click Apply and then OK.
  • The same steps must be taken for the QBCFMonitorService.
  • Once you're done running the method on QBCFMonitorService, open QuickBooks on each workstation.
  • Choose the option to Switch to Multi-user Mode from the File menu.


  • Check to see if your computer is still facing QuickBooks Error H202. If it still bothers you, move on to the next solution.


Solution 2: Network Connectivity needs to be checked


  • Type Run into the search box in Windows.
  • Press the Run button.
  • In the search field of the Run window, type cmd and hit the Enter key.
  • Type ping [name of server] and press the Enter key.
  • If packet loss is observed, the network needs to be fixed.


Solution 3: Include your Server in Windows Host File

Follow these steps to add your server to the Windows hosts file:


  • Go to one of the following places on the computer that is giving you the error to access the Windows host file:


C:\Windows\System32\Drivers\... \sC:\Windows\Syswow64\Drivers\...


  • The host file will show up when you double-click it.
  • Choose Notepad to open the file.
  • After the last IP address in the host file, type the server's IP address and then the server name.
  • You should then add the server information to your Host File.
  • Choose Save from the File menu.
  • Try getting to your company file in multi-user mode once you've finished the steps above.
  • If this doesn't solve the problem, try the next walkway given below.


Solution 4: Creation of new folder for the company file


  • Initially, make a new folder on the server computer.
  • You now need to share the company file. To share the company files, share the folder and set Windows permissions for access.
  • You must now copy the QuickBooks company file to the new folder.
  • Open this copied company file in QuickBooks again in multi-user mode.


Solution 5: Restart QuickBooks Database Server Manager


  • On Windows, type Run into the Search box.
  • Press the Run button.
  • Type services.msc in the Run box , and then press Enter.
  • The next step requires right-clicking QuickBooksDB19 (2009), QuickBooksDB18 (2008), or QuickBooksDB17.
  • After that, choose Stop.
  • Right-click and then choose Start.
  • Now, right-click the Windows start button and choose Explore.
  • Then, click Tools, followed by Folder Options.
  • Click on the View tab, and then uncheck the box next to Hide extensions for known file types.
  • Choose Show hidden files and folders from the View menu.
  • Check the box next to the option to Hide files that are protected by the operating system.
  • In the window that says Warning, choose Yes, and then click OK.
  • Start up QuickBooks again to see if the QuickBooks H202 error got fixed.


Solution 6: Removing the .ND file


  • Type *.ND into the Windows search box and press Enter.
  • Right-click .ND file and choose the Delete option.
  • Next, click the Windows Start button.
  • Choose QuickBooks, then All Programs, and then QuickBooks Database Server Manager.
  • Click the Scan Folder option.
  • Hit on Add Folder and then go to the folder where the company files are stored.
  • Click the Ok button after choosing the company file.
  • Click Scan.
  • When the scan is done, click Close.
  • Open QuickBooks and check to see if the Error H202 resolved.


Summarizing this article, we discussed the various causes that might lead to Error code H202 in QuickBooks and also unraveled the various methods to troubleshoot this QuickBooks aberration. We hope that the problem should be resolved by now. However, if that is not the case, then just give our experts a call at the helpline at 1 800 761 1787.


Guidelines to Fix QuickBooks Error 6000, 82

QuickBooks Error 6000 82 shows up when you try to open or edit your company file(s). Most of the time, this error shows up in case of problems with the network or company files. This article contains all the information you need to know to fix QuickBooks error 6000 82. But let's first throw some light on the different causes leading to this error. Following that section, we will elaborately discuss the different troubleshooting approaches to troubleshoot this QuickBooks error.

Major triggers that lead to QuickBooks Error Code 6000, 82


  • Your QuickBooks company file got corrupted.
  • The file path you are using is wrong.
  • An erroneous network setting may cause this issue.
  • Unnecessary blank spaces in the company file name may also lead to this error.


Updated solutions to troubleshoot QuickBooks Error 6000, 82

Perform the solutions given below to fix this error in QuickBooks.

Solution 1: Getting rid of blank spaces in the company file name


  • Shut down QuickBooks Desktop on all devices that are connected.
  • Right-click on the company file and choose Rename. Open the folder where the company file is placed.
  • While renaming the file, make sure there are no spaces between the file extension and the new name.
  • Open QuickBooks again to see if the Error 6000, 82 is still there.


Solution 2: Turning off hosting.

Single User Access


  • Press the Ctrl and Shift keys at the same time to open QB Desktop.
  • Then, a window called "No Company Open" will show up on the screen.
  • Go to File and then to Utilities.
  • Click Stop Hosting Multi-User Access in the new window that just opened.


  • After clicking Continue, make sure Stop hosting multi-user access is checked, and then click Yes.


Multi-User Access


  • Start QuickBooks desktop by pressing Ctrl and Shift at the same time.
  • The window for "No Company Open" will then appear.
  • Then, choose File and then Utilities.


  • Check if the Host Multi-User Access option appears on the screen. If the option to Stop Hosting Multi-User Access is available, click on it and follow the instructions on the screen to stop hosting.


  • Try to get back into the company file to see if the problem still happens. If it doesn't, please move on to the next step.


Solution 3: Hosting in Multi-user mode


  • Press the F2 key after opening QuickBooks to head to the Product Information section.


  • In the LOCAL SERVER INFORMATION section of the product information panel, choose Hosting Local Files Only.
  • Go to the File menu, then to Utilities, and then to Host Multi-User Access.


  • On a computer connected to a network, open the company file and hit the F2 key to bring up the window with product information.
  • Make sure that the hosting setting in the Local Server Information section is set to "local files only."


Solution 4: Use the Quick Fix My Program


  • Press CTRL+J to see your list of downloads and get the QuickBooks Tool Hub.
  • Double-click "QuickBooksToolsHub.exe."
  • Select Next and Yes to install it and agree to the terms of the license.
  • When the installation is done, click the "Finish" button.
  • Now, open the QuickBooks Tool Hub tool from the Desktop.
  • In the Program Problems menu, choose Quick Fix my Program.


The contents of this article should help you fix QuickBooks Error 6000, 82. If you keep facing issues related to this error, just ring our experts a call at 1 800 761 1787.

How can I Fix Cannot Create PDF File error in QuickBooks?

QuickBooks users sometimes face technical problems with their PDF files or printers. These issues lead to the error message that states that QuickBooks cannot create PDF file. Because of the error with the PDF file, the user is unable to create the PDF file. This PDF-related error often happens when creating, mailing, or printing a report. This error may also show up if you are using an old Microsoft XPS Document Writer driver. This article will explain why QuickBooks is unable to create the PDF file and all the relevant methods to fix this issue. Make sure to read this article all the way through, from the beginning to the end.


Why QuickBooks Cannot Create PDF File issue occurs?

  • The PDF file error could be caused by problems with the driver files.
  • Problems with installing PDF Converter could also cause the error.
  • The printer device not being able to print due to hardware issues.
  • QuickBooks Desktop PDF Converter being offline.
  • Last but not least, this QuickBooks error could also be caused by problems with internet connectivity.


What are the steps to fix QuickBooks Cannot Create PDF File Error?

The below given methods should help you in fixing the PDF file issue in QuickBooks.

1st Method: Use QuickBooks PDF and Print Repair Tool


  • First, download and set up QuickBooks Tool Hub.
  • Once the installation is done, run the tool and go to the Program Problems tab.
  • After that, you need to choose the QuickBooks PDF & Print Repair Tool.
  • Wait until the scan is done before fixing any PDF mistakes that might have happened.
  • Try to make and print the document again in PDF format.
  • Move on to the next solution if the first one doesn't fix the error code.


2nd Method: Enable permissions for the Temp Folder

Follow the steps below to restore the permissions for the temp folder:


  • Press the Win and R keys at the same time to open the Run command window.
  • In the Run window, type %TEMP and press the Enter key.
  • To get to the Properties menu, right-click anywhere in your temporary folder where there is no text and choose it.
  • Next, choose Security from the menu.
  • Make sure that the Security option is set to Full Control for every group and user name.
  • Now, change the permissions for the Temp folder.
  • Next, open QuickBooks Desktop again to see if the problems with making PDFs have been fixed.


3rd Method: Re-setup Microsoft XPS

  • To find the Control Panel at first, use the Start menu.
  • After that, go to the system group and choose the uninstall/change option.
  • Then, choose the option to Turn on Windows features.


  • Make sure both the XPS viewer and the services are turned on. To do this again, do these things:
  • Check the boxes next to XPS services and XPS viewer, and then click OK.
  • Open QuickBooks Desktop again to see if the PDF error is still there.


How to Re-setup XPS Document writer (for Windows 8)?


  • Open the Control Panel and click on the Settings tab.
  • Go to Devices and Printers now.


  • To remove a device, the user must right-click Microsoft XPS document writer and then choose Remove Device.


  • After that, click yes to confirm the change.
  • Click Add a printer in the toolbar and choose Add a local printer/network print with manual settings.


  • From the menu, choose PORTPROMPT-local port.


  • Choose Next.
  • Click Microsoft in the list of manufacturers and choose Microsoft XPS document writer v4.
  • When you click on Next, choose the option to Replace the current driver.
  • Choose the Next tab again.
  • Bring out version 4 right away, and make sure it says Microsoft XPS document writer on it.
  • Choose Done.


For Windows 7 and Vista users:

If you want to reinstall the XPS document writer on Windows 7 or Vista, you can follow the steps below:


  • From the start menu, go to Drivers and Printers.
  • When you right-click MS XPS document writer, choose Remove Device.
  • Now, click on Yes.
  • Select the option to Add a printer from the toolbar and then click on Add a local.
  • Use an existing port is the next thing to do from the menu.
  • Next, choose XPSPort, which is the local port, and click Next.
  • After that, go to Microsoft, click on Microsoft XPS Document Writer, and then click on Next.
  • In this case, the user must Replace the existing driver.
  • Once you've done all of the above steps, restart QuickBooks to see if the PDF file error is gone.


4th Method: Avoiding print spooler


  • The user needs to go to the printer's control panel first.
  • Then, right-click Microsoft XPS Document Writer and choose Printer Properties.
  • Click the Advanced button and choose Print directly to the printer.
  • The user needs to click OK to save the changes.
  • Stop the properties of the printer.
  • Open QuickBooks Desktop again to see if the problem that stopped you from making PDF files has been fixed. If not, move on to the next answer.


5th Method: Delete Invoice Template Logo


  • If QuickBooks Desktop is already open, click the Gear button on the toolbar.
  • From the Company menu, choose Custom Form Styles.
  • Figure out which template should be changed.
  • Go to the Action column and click on Edit.
  • Under the Design tab, click on Make Logo Changes.
  • Then, choose Hide logo and click Done.


While summarizing, we hope that the procedures enlisted in this article helped you fix QuickBooks cannot create PDF file. If you have any related queries, then get in contact with our professionals at 1 800 761 1787.

How To Delete Duplicate Transactions In QuickBooks Desktop?

Several users of QuickBooks stumble upon duplicate transactions most of the times. It is always suggested that users fill in the correct information related to the transaction to avoid the occurrence of duplicate transactions in QuickBooks.  This article offers detailed information that can help you delete duplicate transactions in QuickBooks.  For technical help, feel free to call us at 1 800 761 1787 to avail proper guidance from our certified experts.

Causes of Duplicate Transactions in QuickBooks

The major causes for the presence of duplicate transactions in QuickBooks are listed below:


  • If you import transactions and lists into the company file, QuickBooks might make a double entry. It's possible that the importation is done with software from a third party, which would cause the issue of duplicate transaction in QuickBooks.
  • Sometimes, double transactions could be caused by the Rebuild Data Utility in QuickBooks. The Utility tries to bring back some of the transactions.
  • If you don't pay attention to some information in the Point of Sale system, you could end up with duplicate clients. If a customer record is entered wrong or without a middle name and the customer already exists, a duplicate transaction happens.
  • Transactions that are entered by hand in QuickBooks can also cause duplicate transactions.


This article attempted to unfold all the relevant information to help you delete duplicate transactions in QuickBooks. If you are seeking technical guidance for QuickBooks, then you should call our experienced QuickBooks ProAdvisors at 1 800 761 1787.